
After the Gyrfalcon was hauled, and the team from Haven Boatworks had a chance to inspect her, we came up with a list of needed repairs. Many of the repairs were anticipated, some were unexpected, and since we had a hard budget, some had to be postponed to next year.
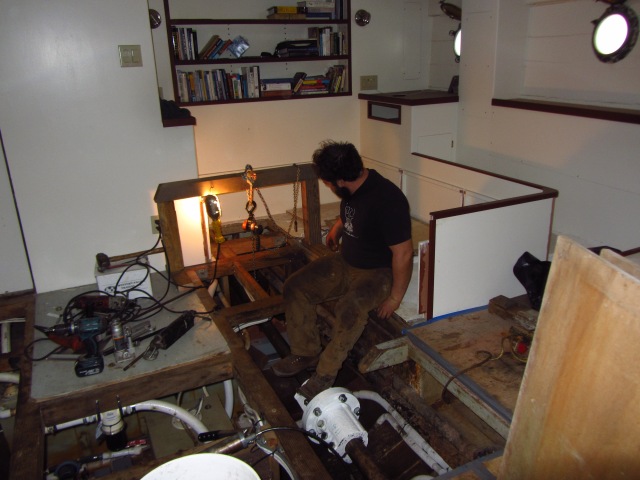
On the anticipated list were the repairs to the drive shafts. As has been mentioned earlier, we have known since we bought the boat that the cutless bearings were bad. Looking at the shafts as they sat in the bearings (what was left of them), you can see a lot more space on the top of the shaft than on the bottom (where the shaft rests). The question was whether the shafts were bent beyond use, or if they were only misaligned.
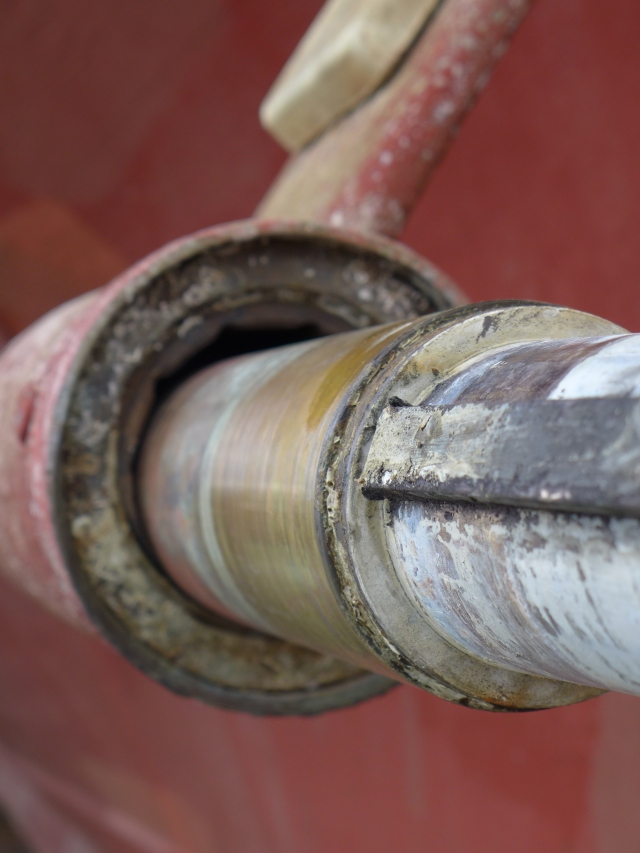
Bad cutless bearing – after prop was removed. Note how off center the shaft is. KM photo
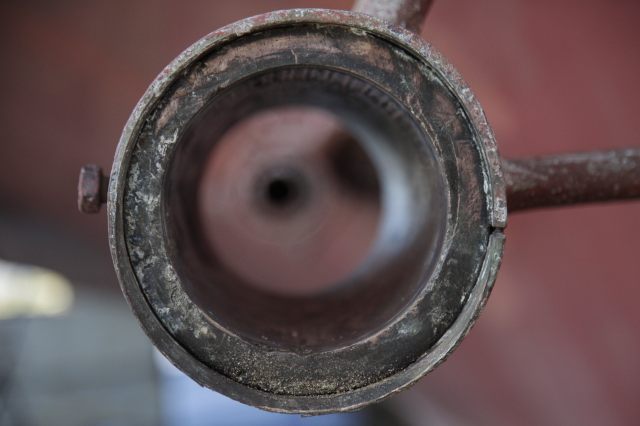
Remnants of the old cutless bearing

New cutless bearing installed
When Stephen put together the initial quote, he included replacing the shafts as a worst case scenario. He said at the time he did not think that the shafts were bad, but included the replacement costs – since if they were bent, it would impact what else we could do this year. Fortunately, he was correct – the shafts were fine, which meant that we had around $30,000 extra dollars to play with. Which was really good, since the surprises quickly ate up that “extra” money.
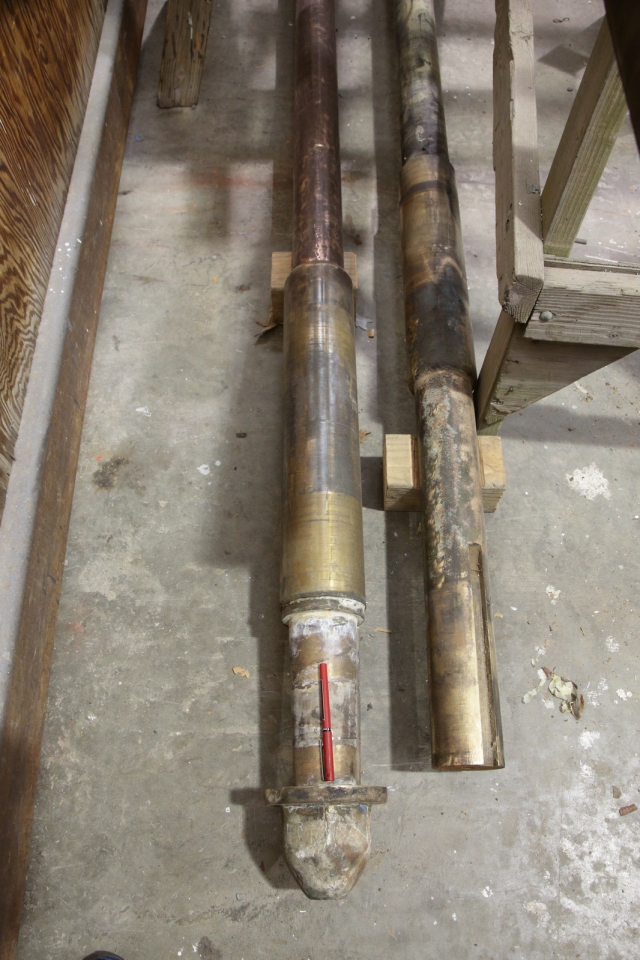
Shafts in good condition

Props getting cleaned up
The final conclusion was that when the engines were replaced in 1971, the new engines and the shafts were not properly aligned, and that over the course of 43 years, the shafts gradually wore away all the metal in the bearings. I for one, am very impressed by the fact that it took that long – the Gyr is incredibly overbuilt.
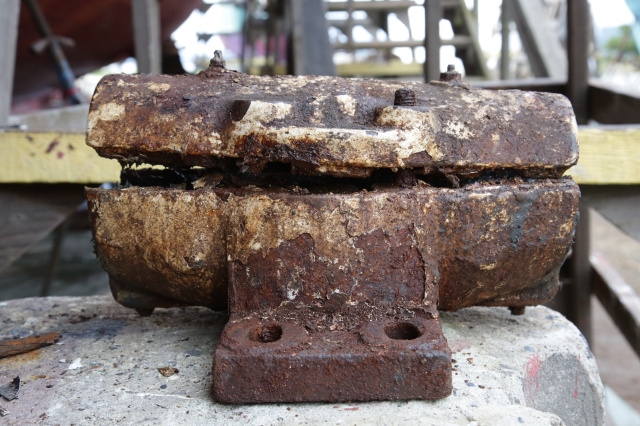
In addition to the cutless bearings, the pillow bearings needed to be replaced. These are the bearings that we had to water cool on the trip over. When they broke the cases on these bearings, they were filled with some metal bands of unknown origin, a lot of grease, and not much else.

Old pillow bearings
Old pillow bearings

New pillow bearings
New bearings being installed
The stuffing boxes are bearings that support the shaft as it goes through the hull. They are packed with linen rope that swells when it gets wet, and which prevents most of the water from entering the bilges. There is a small amount of water that is supposed to drip from the box. The water also helps to keep the bearing cool. Both stuffing boxes were repacked with flax and grease, and realigned with the shafts.
There was also a second set of stuffing boxes, located on the shafts where they left the master stateroom and entered the engine room. These were apparently put in when the boat had watertight compartments (the stateroom was separated from the engine room, etc.) There were several problems with these stuffing boxes – first, they were dry on both sides, since there was no water on either the stateroom side or the engine room side, and second, they were scored because of the misalignment of the shafts. Since there are multiple holes in the bulkhead between the engine room and the stateroom (added over the years for plumbing and heating alterations), we decided that these forward stuffing boxes added no value to boat, and removed them before the shafts were reinstalled.
Once the shafts were all off the boat, they were measured and found to be true. This was good, since they were solid bronze, and the replacement cost would have eaten the entire budget, and then some. In order to align the shafts, the new bearings and the engines, they used monofilament line and calipers to ensure that the shafts were centered.

Hi tech alignment device
The engines mounts were modified so that the engines could be raised to align with the shafts. It is all back together and runs smoothly.

Bolts to align engines
The engine room thru-hulls were another issue. Thru-hulls are large pipes that traverse the hull (thus the name). They are used to bring sea water in to cool the engines, and are located below the water line. There were 5 in our engine room – one for each engine and generator, and a fifth whose original function no one could remember.
About a year ago, I got a call from Ben one afternoon. “Hey, we tried to sink your boat today, but it’s all good now.” In the course of installing the new furnace, someone inadvertently hit one of the old thru-hulls and water started pouring into the engine room. They called a diver, and he came right over and installed a large neoprene patch over the leaking thru-hull, and then tacked a piece of ¾ marine plywood over patch. It has held since then. When the boat came out of the water at Pt. Townsend, we got our first look at the patch – I’m glad we didn’t know before.

Thru hull patch. Rubber membrane, plywood and lots of screws. Probably it is better we didn’t know what it looked like!
Old thruhull plate
We had decided to replace all the thru-hulls. They removed the old thru-hulls and the soft wood surrounding them. They then plugged the holes with large cedar dowels, and put a new piece of wood (a Dutchman) on the outside of the hull over the dowel. After that they found 4 new accessible spots in the hull and put in new thru-hulls. We decided not to replace the fifth thru-hull of unknown function.

Cedar plug of old thru hull

New thruhull from interior
The culprit, as is often the case in old wooden boats is electrolysis. The combination of wood, metal (in this case the thru-hull), and the chlorine ions in salt water can be lethal. Over time the tiny currents generated by this basic battery soften the wood surrounding the metal.
In addition, we replaced the worm-shoe (also known as the bug-shoe). The worm-shoe is a sacrificial piece of wood that runs along the length of the underside of the keel. It is placed there as an appetizer for Toredo navalis, the naval ship worm. Although called worms, they are actually bivalves with very long necks. They eat wood. Before the advent of copper bottom paint, they were often responsible for sinking wooden boats. Since they live in mud on the sea floor, the worm shoe is put on to encourage them to eat it rather than the rest of the hull. The Gyrfalcon spent several years sitting in the mud before we bought her, and the worms had their way.

Worm-eaten worm shoe (eaten by Toredo navalis)
The items listed above were the knowns. Now to the unknowns that reared their ugly heads during the repairs.
It appears that at some point early in our boat’s life, someone banged her bow into something unyielding. We’re not exactly sure when, but Nancy found a plank drawing from 1952 that showed the repair to the forefoot had already been made. The design of the repair was not perfect, and over time, water was able to enter the boat just behind the stem. As you can see from the picture below, you could put a small metal rod in one side of the bow, and it comes out the other side. Fortunately, there did not appear to be any significant damage to the stem, so Haven filled with void with tar and caulked the seams. We will see how it holds over time.

Bow of the Gyr – note the metal rod protruding from both sides

Old plank removed
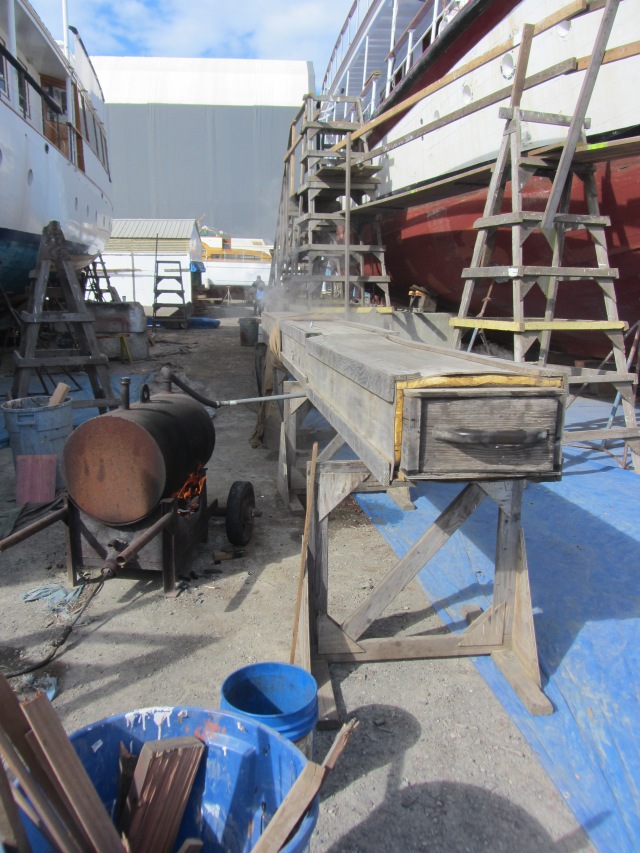
Steam box for bending planks
Steam generation plant

Seam generation plant

Hi-Tech Temperature Monitoring Device

Plank after steaming – held to shape by clamps
In the process of aligning the shafts, we discovered one more serious problem. After the shafts leave the hull, there are 2 struts on each side that hold the cutless bearings and keep everything aligned and stable. Each strut has 8 bronze bolts which go through the planking, then through a 6 inch wooden backing block which had a steel plate on the top under the nuts for the bolts. Again, we had the combination of metal, wood and ions. The electrolysis on the port side was so severe that the wooden backing block scooped out with a spoon (The scientific term used by Stephen: “It had the consistency of cat puke.”) Fortunately, it was discovered before the planks were affected. The strut was removed, a new backing block was installed, and rather than using a metal backing plate, a piece of reinforced G10 – a fiberglass-epoxy laminate was used, to reduce the chances of future electrolysis. During the repair, it was noted that the other (starboard) backing block had been previously replaced, so we should be good to go for some time.

New backing block – made from purpleheart

New backing block with G10 laminate for strength
The last discovery was cracks in the horn timber – the large vertical board that connects the keel to the transom. After extended discussions, it was decided that, as long as we did not venture into the open oceans with strong following seas, we would be safe, but that it needs to be attended to in the future. Since the estimate was 2 men for 2 months to repair the horn timber, and since we had neither the time nor the cash at this point, the horn timber project was postponed.
With the additional work, the project took a few weeks longer than planned. Nancy’s stay at the houseboat ended, and she was lucky to find a spare room with another CYA friend, Tina Stoltz. I remained on the road for work. While the crew from Haven worked during the week, the Dilettante Crew came on weekends. On the weekends “we” (Full Disclosure requires that I state that Nancy came for 7/8 weekends, while I only made it for half) sanded and painted the topsides of the boat (from the deck down) as well as the boot stripe.

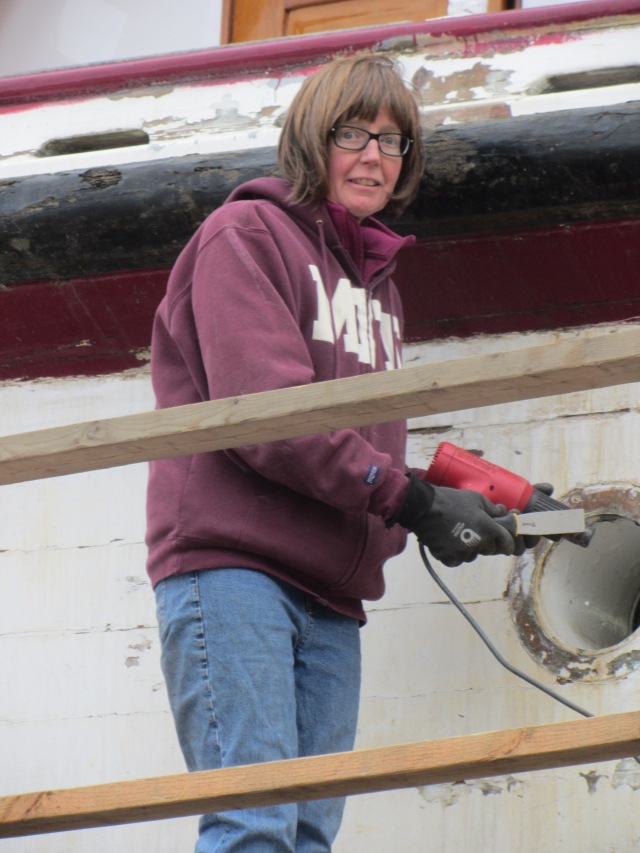
Nancy prepping a porthole for painting

After the topsides and the bootstripe has been painted.
It looks so much better painted – the only thing is that it makes the outer portions of the bulwarks look really crappy – another postponed project that will require attention in the near future. Before the boat went back in the water, the Haven folks put on a coat of antifouling bottom paint (to keep the nasty worms away), and the Gyrfalcon looks great.
The initial splash date was supposed to April 11. We actually went back in the water on May 2, with sea trials on May 5, and the return trip on May 6. Nancy and I got to Pt. Townsend on Friday, May 2 in time to see the boat lifted off the blocks and put back in the water. She sat for a bit in the slings, and when she didn’t appear to be sinking, she was released. We spent the weekend on board, preparing for the trip home. It was great to be back in the water, since for the last 2 months when we looked out from the boat all we saw was concrete and dust. A boat just feels “right” when it is in the water. The Gyr was happy to be home.

Gyrfalcon back in the water at Port Townsend

Thanks for the primer in bearings and shafts. Might come handy some day! Loved the last photo of her back in the water– she is really coming together!!
N.
I am the grandson of Raymond Stanton Patton in whose name the Gyrfalcon was originally christened. I was delighted to learn that you had done such a loving job of repurposing the ship (boat?). I have an original photograph of The Patton that does not appear on your blog, and I would be glad to send you a copy.
Thank you for keeping his memory alive, even if it’s under another name.
James Wright Sent from my iPhone
Wow! What a adventure. I hope you are making this into a book. I think of my boat problems and feel sorry for myself until I read yours and then I know why I really don’t want a bigger boat. But, we are glad you are back in the water. Many thanks for sharing this with us and keep the positive mindset.
Best, John & Caroline
Lookin’ GOOD!